Lately I have been awful about working on projects. I started a jacket a month ago. It has been sitting on our dining room table in a stack of pieces all that time. I’ll put a sleeve on, and then take a sleeve off. I’ll top-stitch a hem, and then rip it all out. It’s just not coming together in the way I’d like and so sewing seems like an intrusion on my time instead of a fun little escape.
But we hosted a little Thanksgiving dinner for our friends this weekend and the night before everyone came over I realized that our new table, though wonderful, does not wipe down easily. At first I was going to make placemats to help combat drips, but realized that with a full meal to prepare the next day, seven placemats was too big a project to begin at 10pm the night before. So I made coasters. And I said “screw it” to perfection. So now I have eight really imperfect coasters that I whipped up in an hour, and am finally feeling a bit more encouraged that sewing can be fun, not tedious.
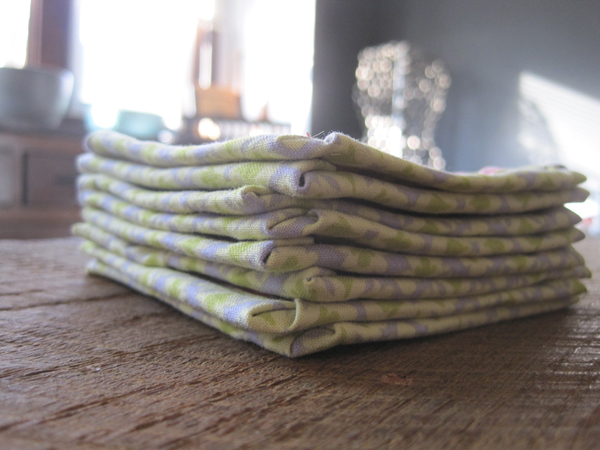
Using a 3×3 inch square glass coaster as my guide, I cut out 8 felt squares and 8 pieces of the pink floral fabric used for the top of each coaster. I placed the fabric squares on top of the felt squares, then pinned them to the green/blue fabric I used for the back of the coasters. I didn’t even take time to cut out the squares for the backs of the coaster and instead pinned all the fabric and felt squares to the backing fabric, leaving approximately 1 inch around each. This extra inch is folded up and becomes the binding. If you want to make coasters, it probably would be a good idea to actually cut the backing fabric out (4″x4″) before pinning the top fabric and felt to the back fabric. It might make things quicker in the long run (and a little more precise).
With all of the squares pinned in place, I randomly stitched a few lines across each square to hold all the fabric layers together. Then I cut out each square, cutting the backing approximately 1 inch larger (4″x4″) than the top fabric and felt layer. Since I did all this without measuring, sometimes I had an even extra inch, sometimes I didn’t. No big deal. I just had some uneven binding around the edges.
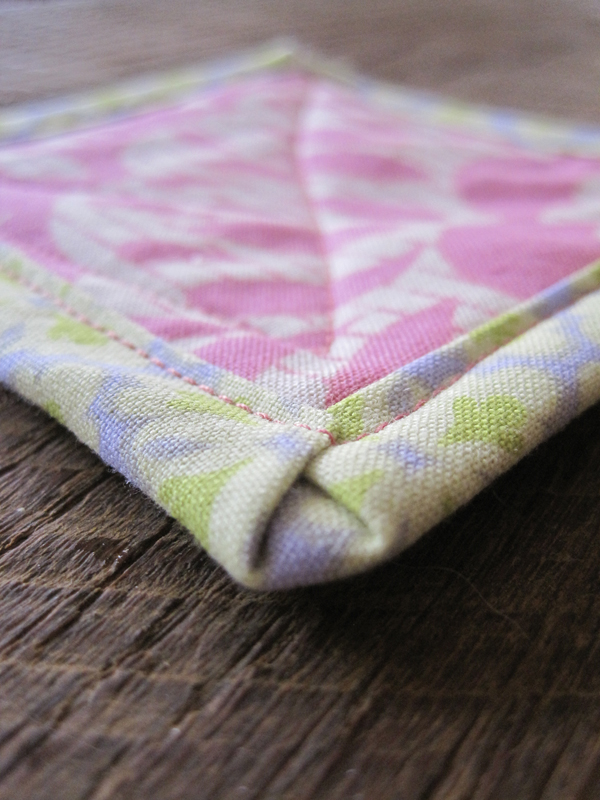
To form the binding around the edge of each coaster, I folded the backing fabric in to meet the edge of the top fabric, then folded it in again, encasing the raw edge with the excess fabric from the bottom of the coaster. I only finger pressed the fabric and half-attempted to make mitered corners. Bothering to get the iron out would have helped the end result on these coasters, too. But it didn’t really enter my mind. In fact, I can’t emphasize how little I thought about anything in the making of these coasters. But you know what? They were quick to pull together and did the trick. No drips. And they are kind of sweet in all their imperfection. What do you think?
Do you need perfection when you make something, or do you embrace those little imperfections as charming?

Leave a Reply