Two years ago, after a particularly uncomfortable dinner we hosted with eight people smashed around our small table built for four, we decided we wanted a great big salvaged wood table. We looked at styles we liked, developed plans for the perfect table, got chairs as gifts from our parents to go around said table, and then set out to look for wood. And that’s kind of when our momentum fizzled. Finding the wood we needed was going to be a challenge. I mean, we haven’t been searching for it non-stop for the past two years, but we’ve been keeping our eyes open. So it was with great joy we happened upon Wabash Lumber about a month ago and headed out on a two-hour drive to get our wood.
Salvaged wood is not straight. It’s not clean. It can make your head swim when trying to find the right pieces that will work together for the perfect table. But eventually we found two 13′ 2×10 boards and a 2×4 that seemed could work together, and we wrangled them into our car and headed home. I was coming into this project with no real grasp of how to execute it and so a lot of it was up to my husband to figure out. Luckily he had some old furniture-making knowledge from college to fall back on. And he used this knowledge to help me understand what we were doing and pull off a really great project. He’s multi-talented and pretty swell.
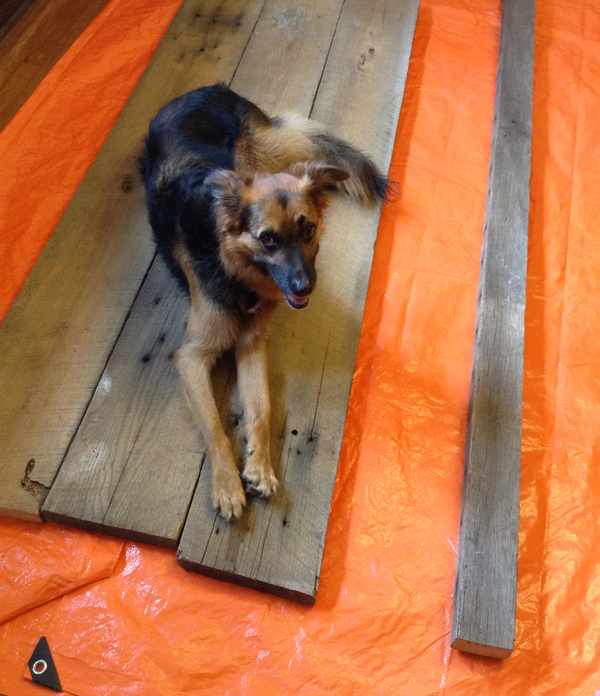
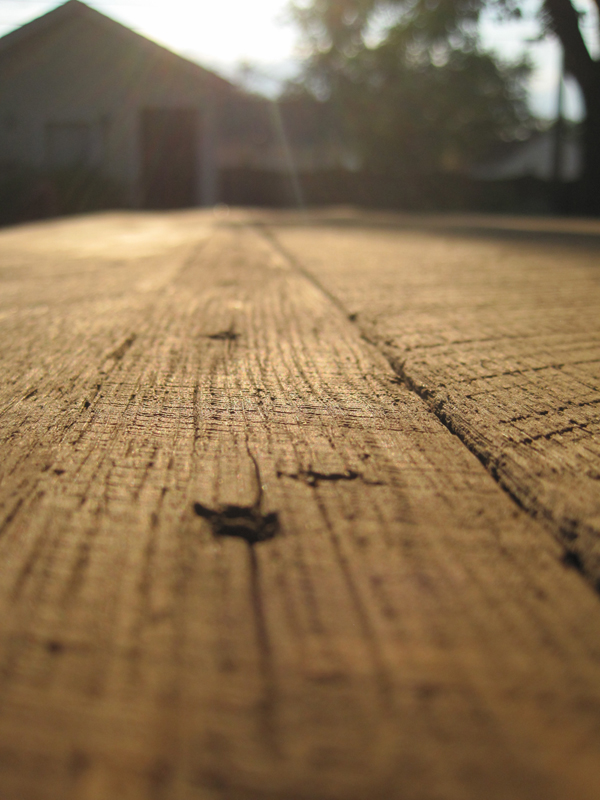
Jack was really excited about the new wood. The boards pictured below are pre-scrubbed. I used a course plastic bristle brush and some water with a dot of wood soap in it to clean them thoroughly once we moved the project outside.
So, first off, after playing with the way the boards worked together, we decided to split the 2×4 and create two 2×2’s to run along either side of the center 2″x10″ board. Then we moved everything outside and started cleaning, splitting, planing and fitting it all together. Wood, in all stages, is a beautiful thing.
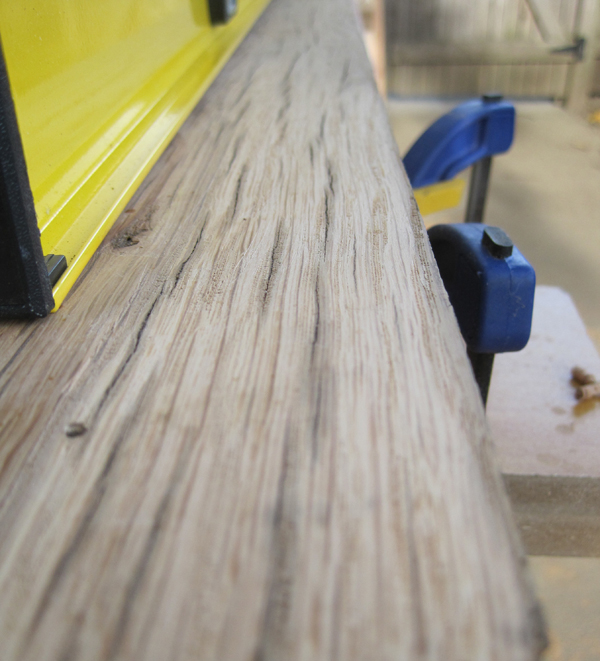
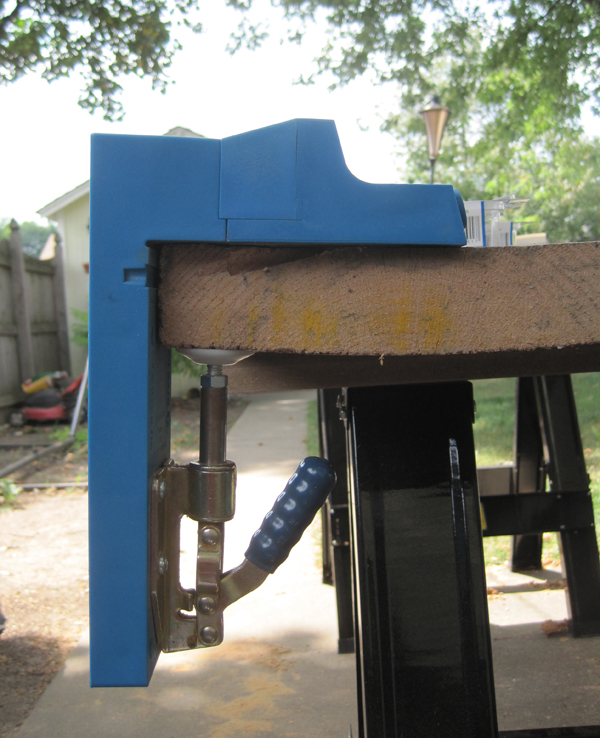
We didn’t plane everything perfectly so there are a few small gaps between boards. Initially my husband considered using joining discs to attach all the pieces, but eventually settled on using a pocket hole jig that a generous co-worker lent us. The 2x2s are screwed directly into the outer boards, then the outer planks are attached to the center board using the jig. Below is a side view of how the jig works.
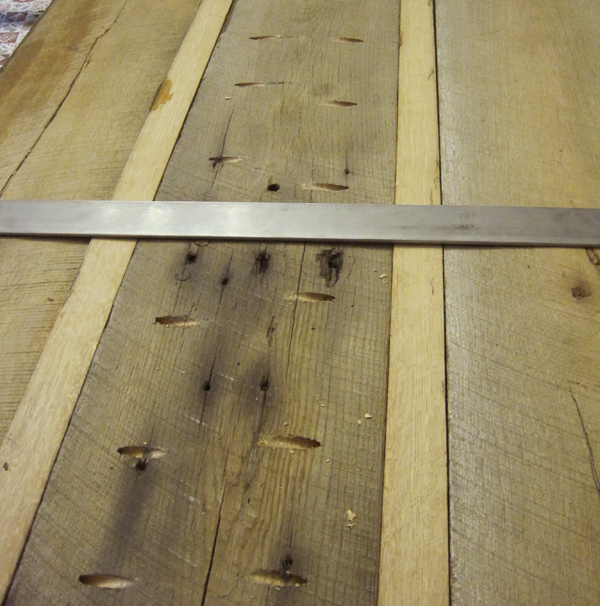
Although the table top seemed pretty sturdy once it was all screwed together, we wanted to add extra stability, and so added steel straps to the bottom. A friend drilled the holes and cut the straps down for us using his equipment. This whole process made us super thankful for our friends who shared their knowledge, their muscle and their enthusiasm for the project as I wasn’t always super helpful, especially when things didn’t seem to be going by-the-book. The image below is the bottom of the table after everything had been screwed into place, but before we’d measured, cut and drilled the three straps along the bottom.
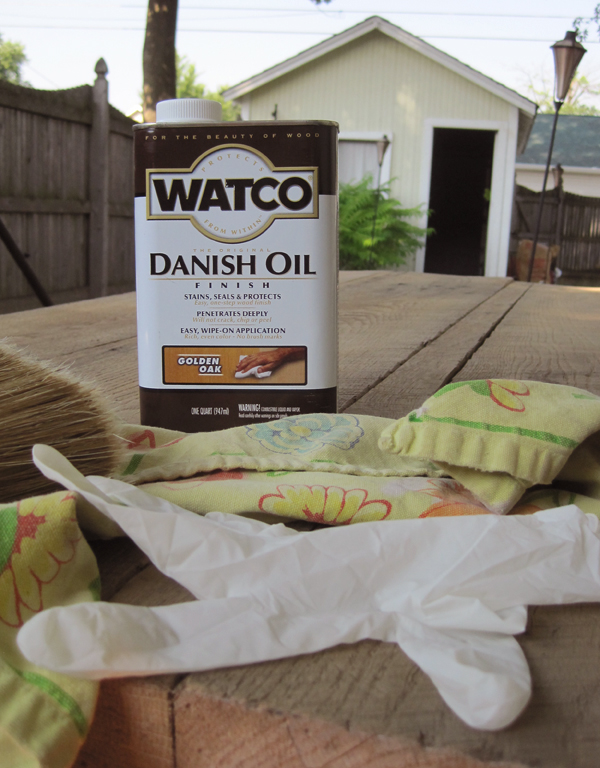
We had been working with unevenly cut boards throughout the process until this point, and so once we got the table top as flat as possible and had affixed all the boards together, we cut the ends off evenly. Then we banged up the freshly cut edges with garden implements and other tools to try to make these edges as roughed up as the rest of the table. Then we sanded down any splintery edges on the rest of the table and on the bench before oiling with Watco Danish Oil. We opted for oil rather than poly because we wanted the wood to be protected, but wanted to preserve the more rustic look.
We tested out the finish last night when we had large dinner with my family. Our table top was covered in lots of large glasses of iced tea, sweating onto the wood and drips of salsa and ice cream, but this morning it seemed no worse for the wear. The oil will require upkeep, but seems to be doing the job.
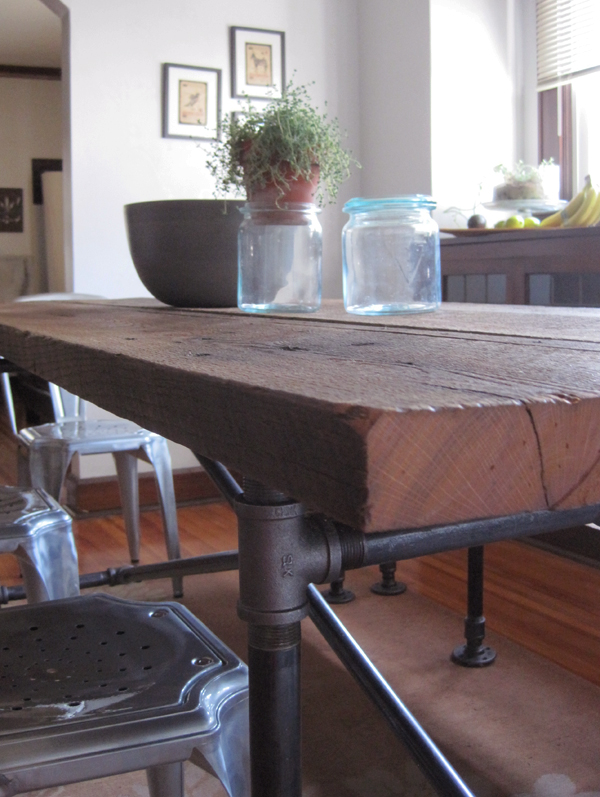
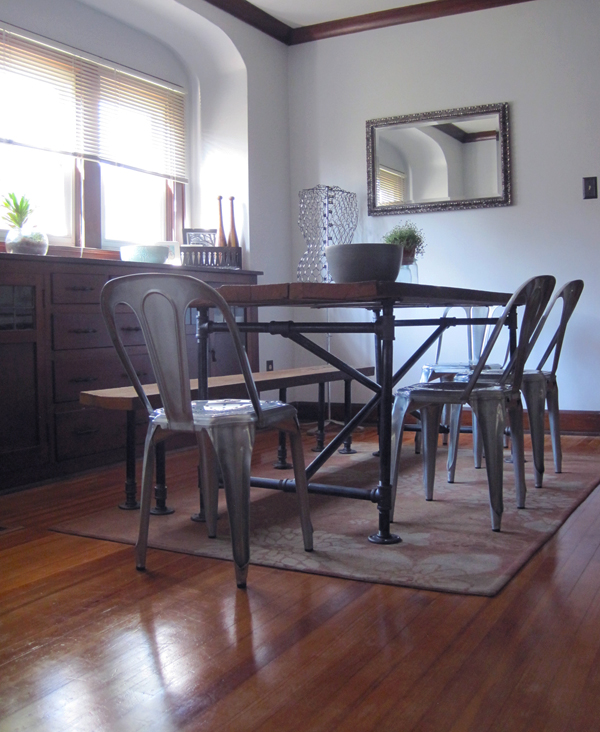
After the table top and bench had been oiled and then dried, we brought everything inside to affix to the steel pipe base built with pieces you can find at your local hardware store. The table top, measuring 75.5″x32″, sits on the 60″x28″ base. It stands 30.5″ high and the bench stands 18″ high. We now have a full dining room set that seats up to 10 and we kind of love it. It’s so nice to finally have a place everyone can sit around for hours as we eat and talk.
Some folks have asked us about the table and bench details, and so here’s the run down on parts and pieces that you would need if you were to embark on a project like this. The parts included below will make a table and a bench.
1″ black Steel Flange (For feet and affixing to table and bench top): 22 @ 5.54 = $121.88
1″x60″ black steel nipple (For the long X cross bars): 2 @13.29 = $26.58
1″x4″ black steel nipple (For the table legs): 4 @ 1.29 = $5.16
1″x18″ black steel nipple (For the table legs): 4 @ 4.86 = $19.44
1″x10″ black steel nipple (For the horizontal supports on top and bottom, both ends of the table): 4 @ 4.75 = $19.00
1″x12″ black steel nipple (Four for the horizontal supports on top and bottom, both ends of the table. Six for the bench legs.): 10 @ 5.55 = $40.90
1″ black steel tee (For joining all the legs and the cross bars of the table base): 12 @ 2.09 = $25.08
1″ close black steel nipple (For joining the tees to the flanges at the top of the table base): 4 @ .89 = 3.56
1″x2″ black steel nipple (for bench legs): 6 @ .98 = $5.88
1″ black steel coupling (to attach 1″x2″ nipple to 1″x12″ nipple for the bench legs): 6 @ 1.49 = $8.94
50 count packet of 2.5″ pocket screws = $5.47
Quart of Watco oil = $15.96
Salvaged lumber = $235
3 feet 3/16″x2″ weldable flat steel straps (for additional support): 3 @ 7.77 = 21.81
18 count 1/4″ flat washers (salvaged wood is uneven so you’ll need to use a few of these to even things out when you attach the flanges to the wood in some cases) = $1.98
Grand total: $546.63 (before tax and minus any other incidentals like tools you may not be able to borrow from friends). It’s about the price we would pay for a store-bought table and seating, but it’s also larger than a lot of the stuff out there, and is made with real wood. I think a lot of people see self-made things as a means of saving money, but we see it more as getting exactly what we want. And this is just that — exactly what we want.
Leave a Reply